

How To Install Nasm On Windows
Footstep 2: Install a Compiler and Assembler
Table of Contents
-
Step 2: Install a Compiler and Assembler
-
2.1: Install a GCC compiler
-
2.2: Download Netwide Assembler (NASM)
-
Part 3: Set the path to the assembler
-
Verify the programs execute in CMD
-
Errors
-
Set path in Windows System
-
-
Objective: Install MinGW and NASM to compile an .asm file and then create an .exe executable.
2.1: Install a GCC compiler
We will use MinGW to compile our associates projects
-
Observe the installer on MinGW'southward site or download information technology from this site straight.
-
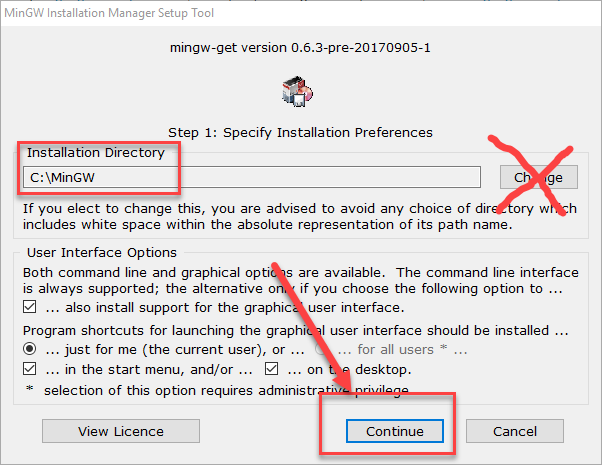
Note the default the installation directory and and then press Proceed.
Circumspection
-
MinGW might non piece of work correctly if you install it in some other directory other than the default.
-
And so, we recommend using the default installation directory.
-
-
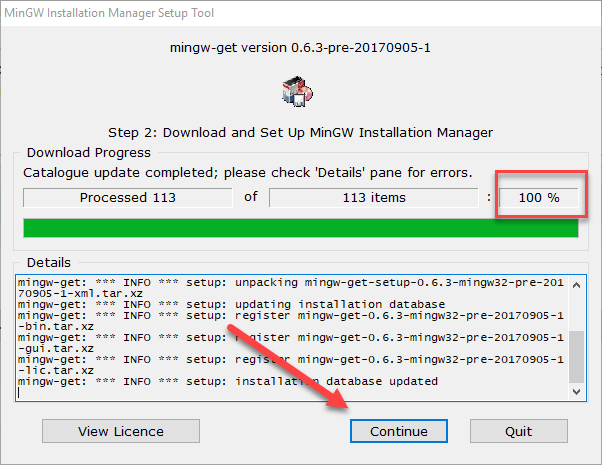
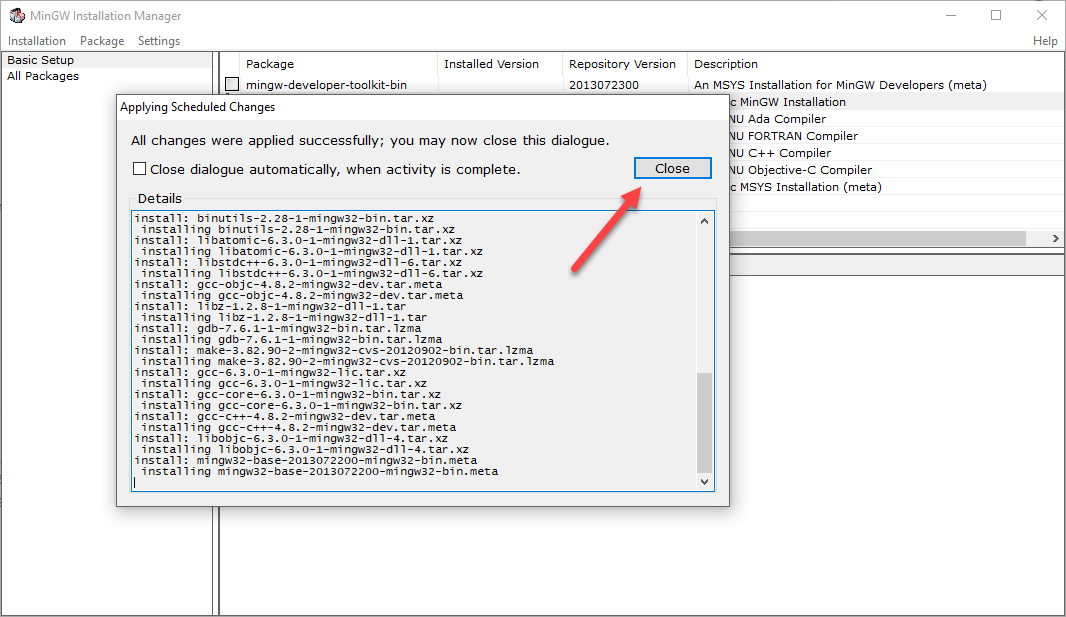
The installer will download and install MinGW.
-
Verify that the installer downloaded and installed all selected items.
-
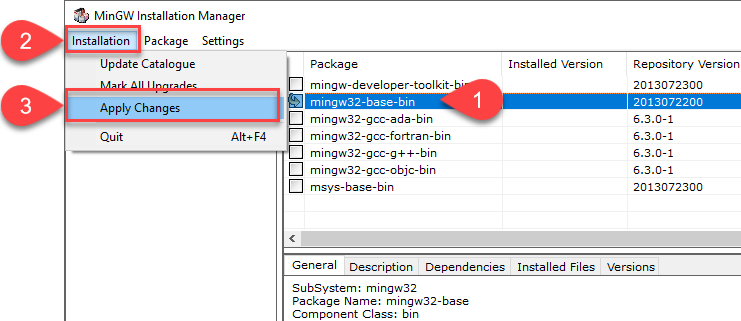
Select
mingw32-base-binand apply changes.-
From the menu:
Installation ➜ Apply Changes -
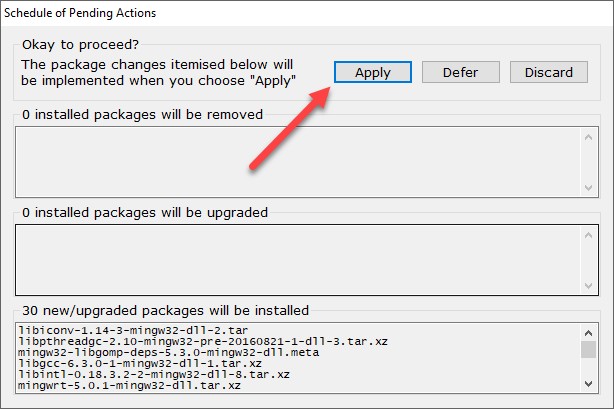
The installer might have a while depending on your internet connexion.
-
-
Press the Close push when the packages finish downloading.
-
Verify that
ming32-base-bininstalled.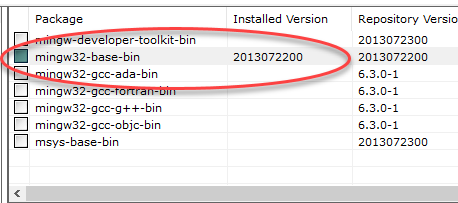
-
Y'all tin now close the installer window.
two.2: Download Netwide Assembler (NASM)
We volition utilise the Netwide Assembler (NASM) for this class. You tin can read more than information about NSAM from https://en.wikipedia.org/wiki/Netwide_Assembler.
-
Find the installer on NASM'due south site or download the Windows 10 x64 version from this site directly.
-
Execute the installer as an administrator
Annotation
You will need to execute the installer as Administrator if your logged in user cannot write to
C:\MinGW\bin.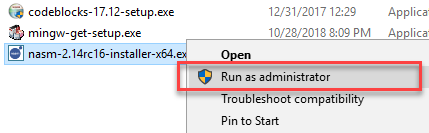
-
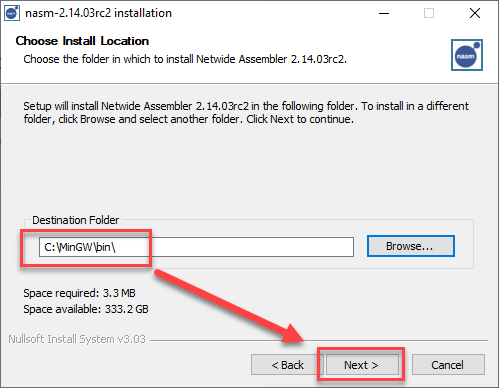
Install to
C:\MinGW\binAnnotation
It is easiest to fix upwardly if you install information technology to the same directory as the GCC compiler. Otherwise, y'all have to add the systems paths for both applications.
Part 3: Set the path to the assembler
Windows needs to know where to find gcc.exe and nasm.exe, which it will do past setting the path=C:\MinGW\bin;%path%
Starting time, we'll verify that Windows recognizes gcc and nasm using the command line. Then, nosotros'll set the path every bit role of the system path.
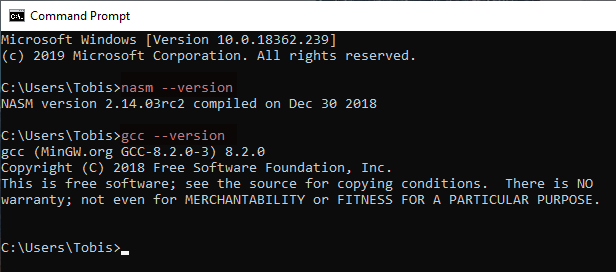
Verify the programs execute in CMD
Note
This path is set Simply for this CMD instance. You have to run the command once again when yous close the CMD window. Or, yous can specify the absolute path to the file.
You lot can add information technology permanently the Arrangement Environs Variables.
-
Open up Command Prompt (CMD)
-
Set the temporary path by executing:
path=C:\MinGW\bin;%path% -
Verify the path prepare correctly
-
Type:
repeat %path%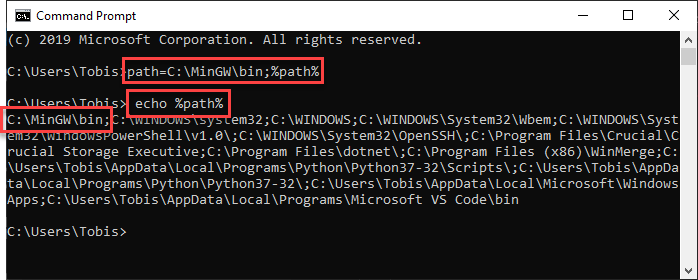
-
Type:
gcc --versionVerify that it displays the file version.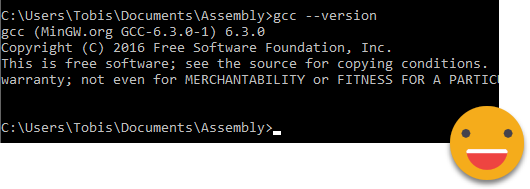
-
Type:
nasm --versionVerify that information technology displays the file version.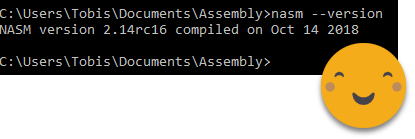
Errors
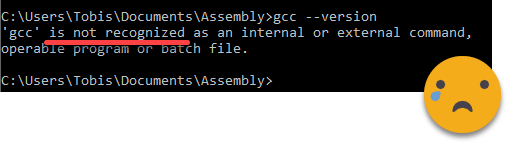
If you lot get a not recognized error, then the path is not gear up correctly or you installed MinGW or NASM in a dissimilar directory.
-
Attempt executing information technology using the full path:
C:\MinGW\bin\gcc --version -
Verify the installation path:
dir C:\MinGW\bin
Set path in Windows System
Tip
-
Set up the path to your assembler and compiler in the Windows path then that all applications can find it.
-
Otherwise, yous have to specify the total path to the applications.
-
Open up the
Advanced System Propertiesin Windows. There are several ways:-
Re-create and paste i of these commands to Windows Explorer or Outset Card
-
Advanced System Settings
-OR- -
C:\Windows\System32\SystemPropertiesAdvanced.exe
-
-
Navigate from the command panel:
Control Panel > System and Security > System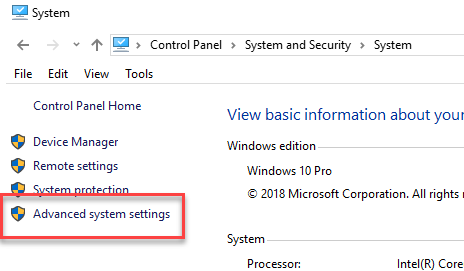
-
-
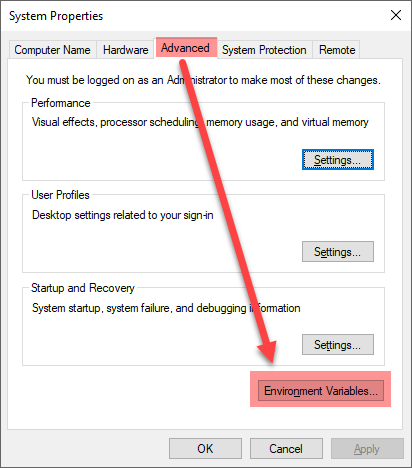
Click on the Environment Variables button
-
Select
Pathunder User variables and then click on the Edit button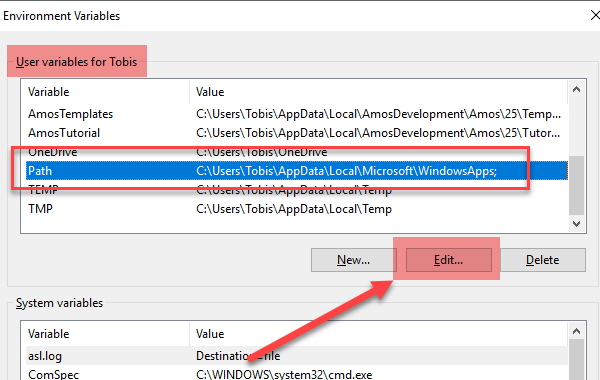
-
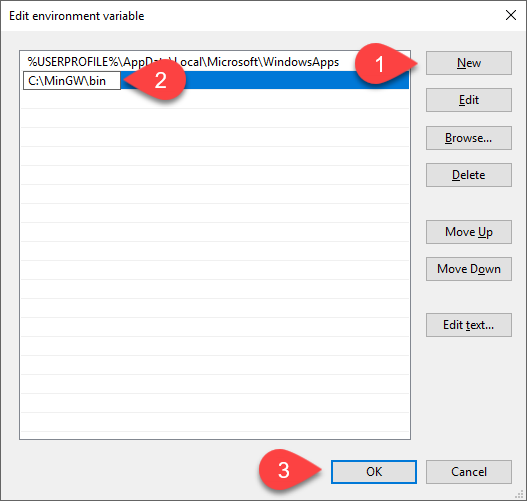
Click on New and then add a variable for the bin binder of NASM and GCC:
C:\MinGW\binNote
Y'all must add both paths if you installed NASM in a different folder.
-
Printing OK on all windows
-
Close and reopen the CMD windows to get a new prompt.
-
Verify that the NASM and GCC display the versions correctly before continuing.
Source: https://labs.bilimedtech.com/nasm/windows-install/2.html
Posted by: smithsamphy.blogspot.com
0 Response to "How To Install Nasm On Windows"
Post a Comment